Ice Cream Cone Cookies
Yesterday was the first day of Spring. Funny story about that. The day before, I was complaining to the girls about how cold I was.
Big D said: “Don’t worry Mom, our teacher said tomorrow (Wednesday) is the first day of Spring. That means it is going to be warm tomorrow! And you know what that means?!”
Email Me This Recipe!
Need to save time? Have this article emailed straight to your inbox + sign up for all the latest recipes!
Me: “Well, I don’t think it is going to be warmer tomorrow honey, but yes, Spring starts tomorrow, so hopefully warm weather is on it’s way. And no…. I don’t know, what DOES that mean?”
Big D: “The ice cream trucks are going to start coming around our block!”
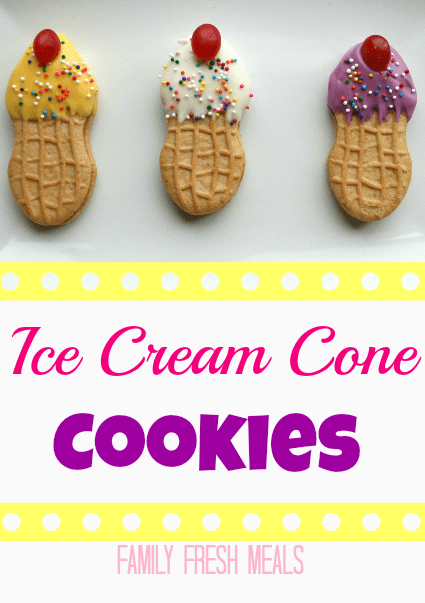
Oh boy was she heartbroken to hear that we still has WEEKS of cooler weather and that the ice cream trucks weren’t coming the next day. I had seen these cookies on Pinterest awhile ago and knew this was the time to make Ice Cream Cone Cookies !

Ice Cream Cone Cookies Edible Craft
Here is what you need:
- 1 package of Nutter Butter Cookies
- 2 cups of candy melts (use whatever colors you want the “ice cream” to be)
- 30 small colored candies, such as mini jelly beans
- 2 TBSP Sprinkles
Wax Paper
- Start by melting your candy melts as directed on package. The girls picked out yellow, purple and white melts to use for this.
- Once melted, carefully dip one end of the cookie into the candy melt.
- Add sprinkles and candy pieces to the top.
- Place on wax paper and let dry for 10-15 minutes, or until candy melt has hardened.


Ice Cream Cone Cookies
Email this recipe!
Get this recipe emailed straight to your inbox!
Ingredients
- 1 package of Nutter Butter Cookies
- 2 cups of candy melts use whatever colors you want the "ice cream" to be
- 30 small colored candies such as mini jelly beans
- 2 TBSP Sprinkles
- Wax Paper
Instructions
- Start by melting your candy melts as directed on package. The girls picked out yellow, purple and white melts to use for this.
- Once melted, carefully dip one end of the cookie into the candy melt.
- Add sprinkles and candy pieces to the top.
- Place on wax paper and let dry for 10-15 minutes, or until candy melt has hardened.
Nutrition
Nutritional Disclaimer: Family Fresh Meals is not a dietician or nutritionist, and any nutritional information shared is only an estimate. We recommend running the ingredients through an online nutritional calculator if you need to verify any information.
Did You Make This Recipe?
Make sure to share it with me below!
Here are some more fun desserts to try!
Post Updated August 2020