Monster Pops Rice Krispie Treats
Looking for the perfect snack for a Halloween party or a monster movie night? Try these adorable Monster Pops Rice Krispie Treats!
If you’ve been following me for a while, you already know that I’m a huge fan of Rice Krispie treats. They’re super easy to make – four ingredients, one pan, zero baking – and kids love them.
But the best thing of all about Rice Krispie treats is that it’s so easy to make new versions of them. I’ve made Chocolate Dipped Rice Krispie Treats for Valentine’s Day, Gingerbread Rice Krispie Treats for Christmas, and Circus Animal Cookie Rice Krispie Treats that work for any festive occasion.
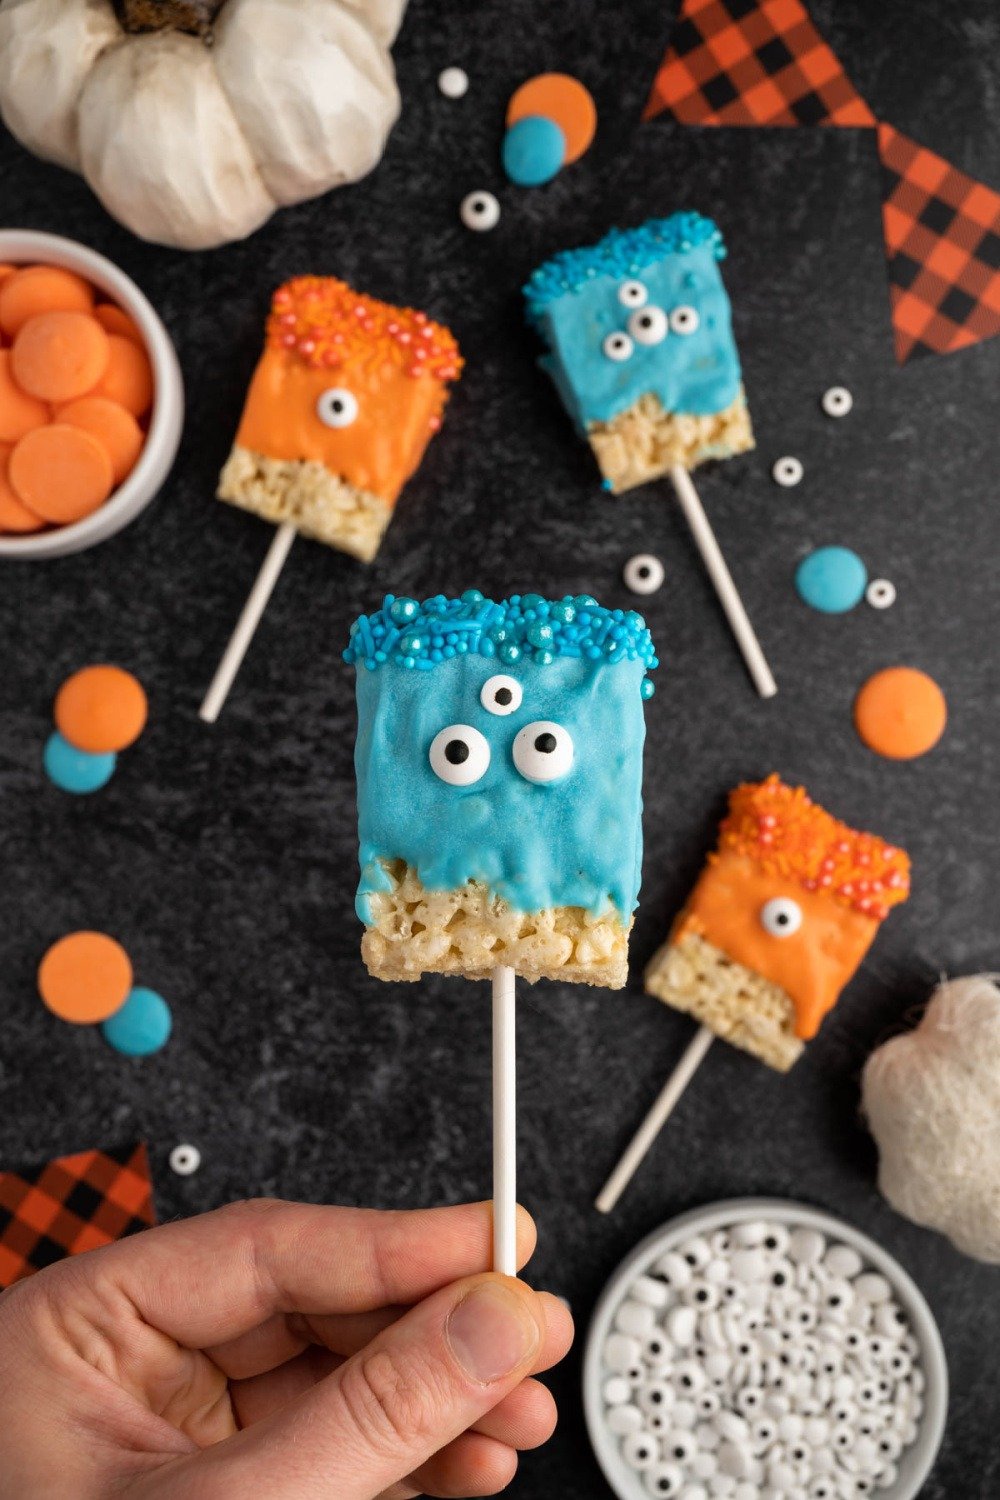
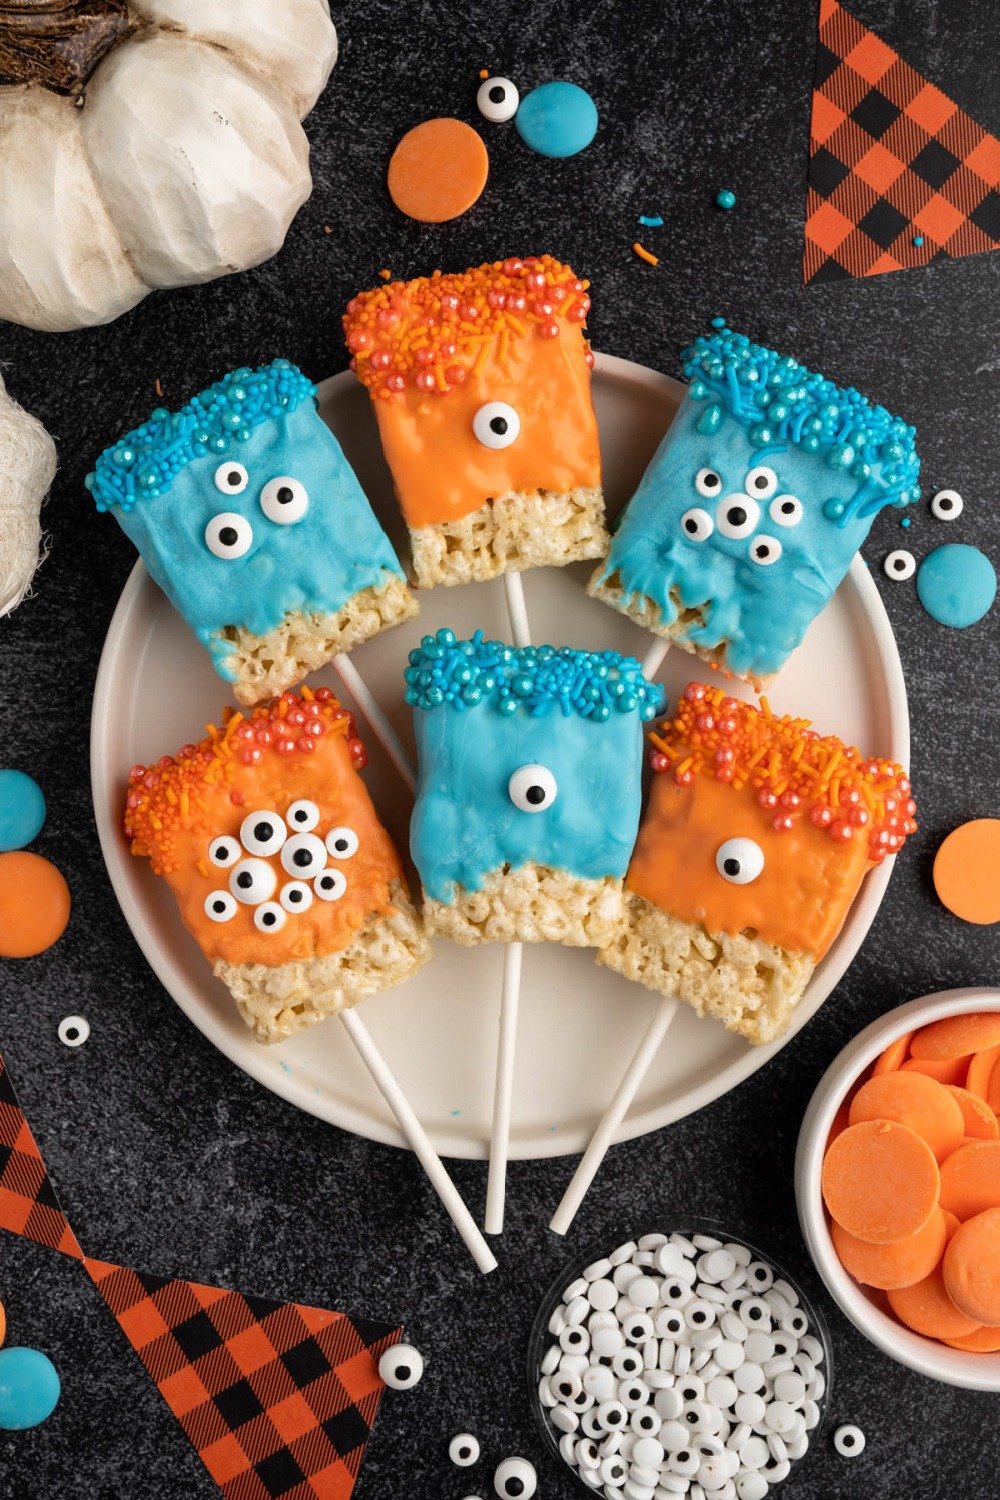
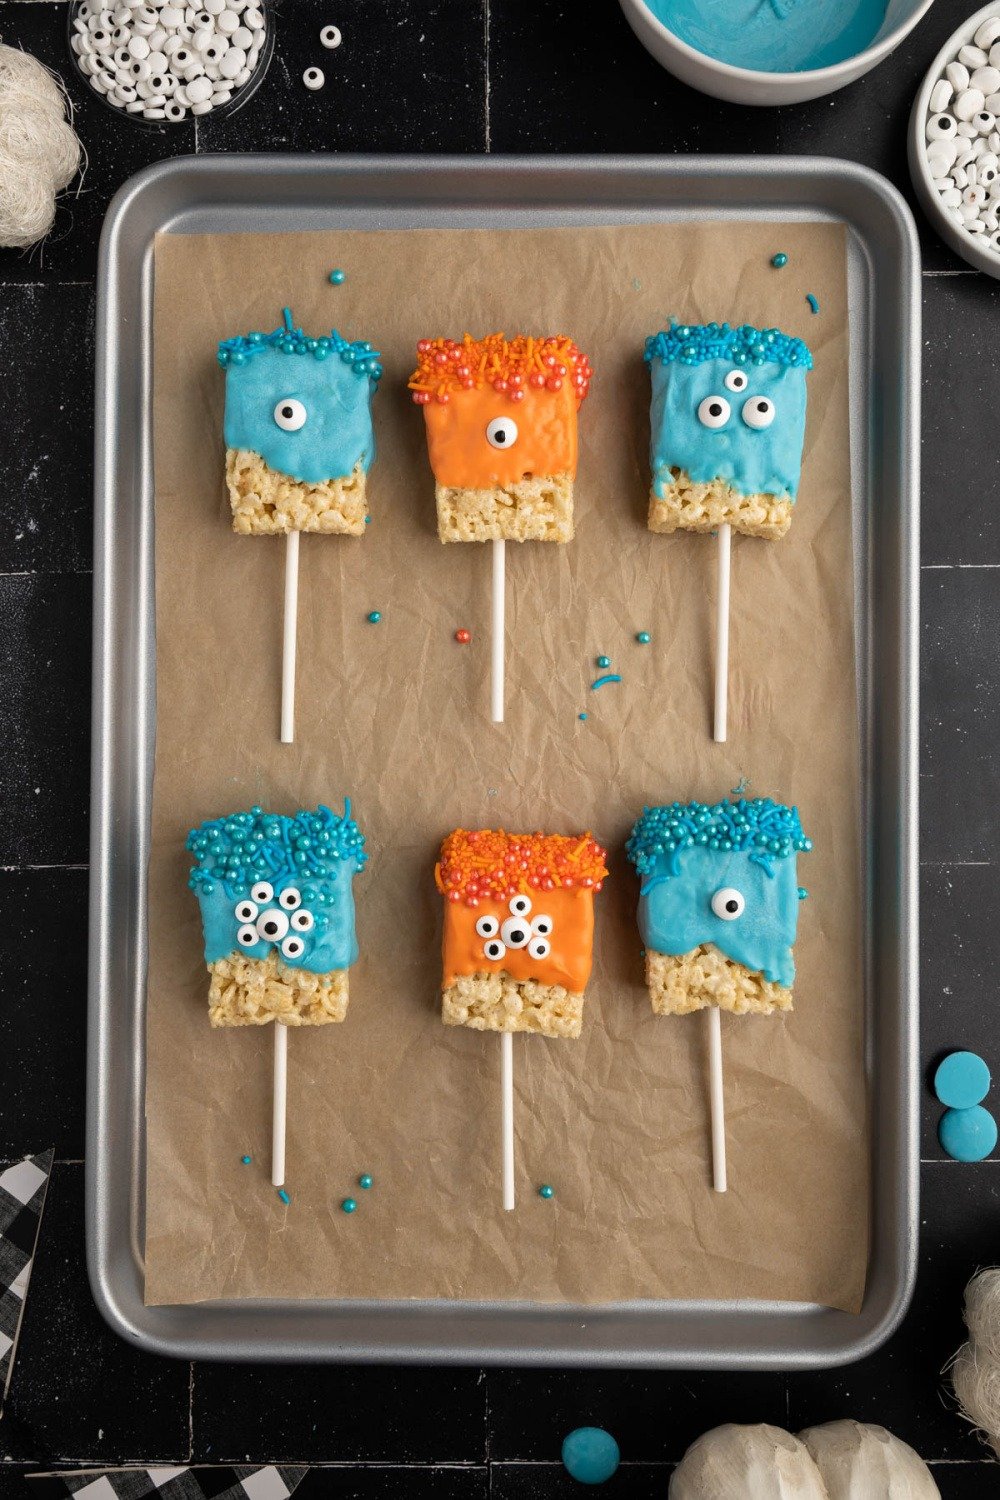
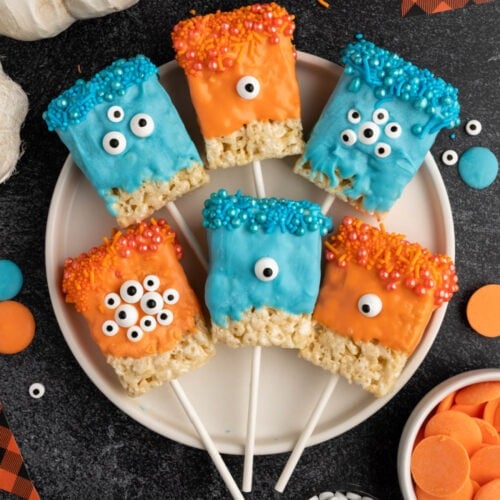
First, I decked them out in two colors of frosting, orange and blue. Along with the googly eyes, I gave them “hair” in the form of sprinkles in matching colors. And for the real kicker, I put them on cake pop sticks to turn the monster treats into monster pops. For any spooky event, these Monster Pops are your go-to party animals.
Email Me This Recipe!
Need to save time? Have this article emailed straight to your inbox + sign up for all the latest recipes!
Of course! Homemade Rice Krispies Treats would work great in this recipe. Using store-bought treats is a nice shortcut, but if you have time, homemade is always a plus. If using homemade Rice Krispies Treats, be sure to allow enough time for the to set properly before decorating.
If you can’t find colored melting wafers, you can use white melting chocolate and color it yourself with food coloring. Melt the chocolate first and then add a drop or two of food coloring, stir and add more until you get the right color.
Melting wafers or candy melts are usually made with a fat that is solid at room temperature instead of cocoa butter. This makes them melt easily and dry quickly, making them perfect for dipping or drizzling, however, white chocolate can also be used in this recipe but generally requires tempering.
If you use real white chocolate instead of candy melting wafers (designed to be melted in the microwave), you may want to temper chocolate. To temper chocolate, chop it into small pieces about ½-inch wide. Place the chopped chocolate into a stainless-steel bowl. Fill a saucepan 1/3 of the way full with water and place it on the stove over medium heat. Bring the water to a simmer. Place the stainless-steel bowl over the water, but not in direct contact with the water. Use a rubber spatula to stir the chocolate until it is smooth and completely melted. Once melted, the chocolate is ready to use and can be removed from the heat.
Recipe Notes:
- Look for cylinder sprinkles or a mix of cylinder and round sprinkles. Usually, a variety of sprinkles can be found in the cake decorating aisles of craft and big box stores.
- Candy melting wafers and dipping chocolate do not require tempering, but be sure to read the instructions on the package before purchasing. Real white chocolate may need to be tempered (see above for information on tempering).
- Adding a tsp. of coconut oil to most white chocolates can make it smoother when melting in the microwave without tempering.
- Melting wafers tend to dry quickly. If you are working with kids or are just taking your time, work with only one color at a time and melt the wafers in batches to prevent them from drying out before you are done working.
- When dipping the treats, be careful not to let the cake pop stick poke through the Rice Krispies Treat. Once the chocolate hardens the placement of the stick will become much more secure and this will no longer be an issue.
- Individually wrap each monster pop with plastic wrap or slip them into individual treat bags if they are going to be handed out at school. Make sure the chocolate is completely dry before wrapping.
Monster Pops Rice Krispie Treats
- Line a baking sheet, counter top or table with parchment paper. You will need space to do all 20 treats at the same time or you will have to do them in batches, letting each batch dry before transferring it.
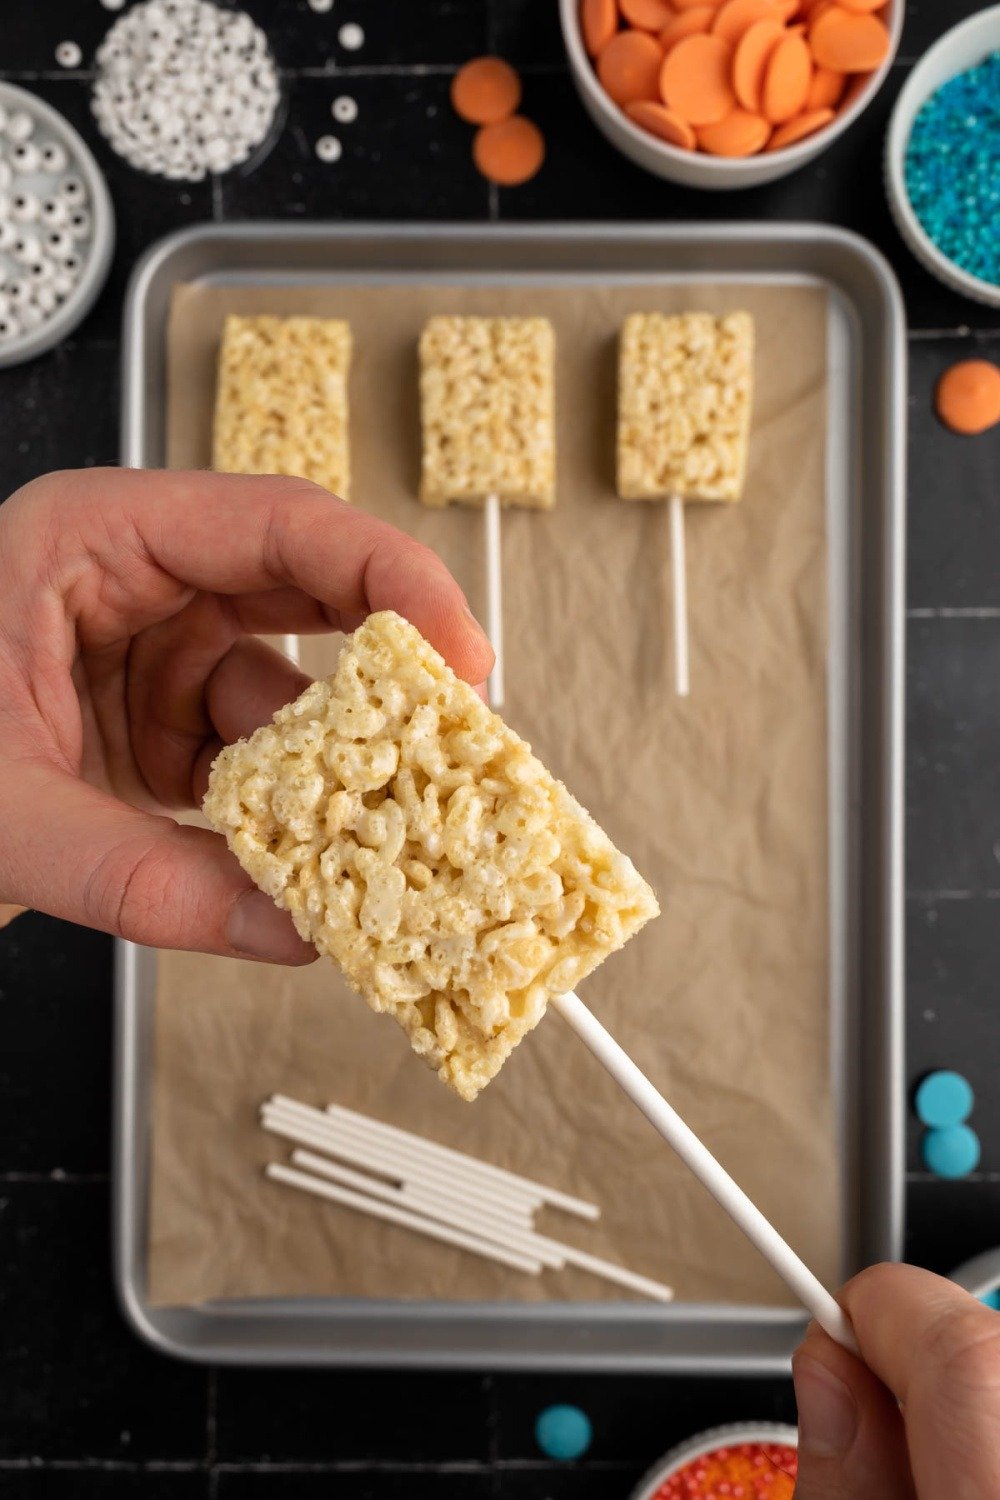
- Unwrap Rice Krispies Treats. Skewer each treat with a cake pop stick. Press the stick in at the short end of the Rice Krispies Treat and push it in until it is about halfway in the treat.

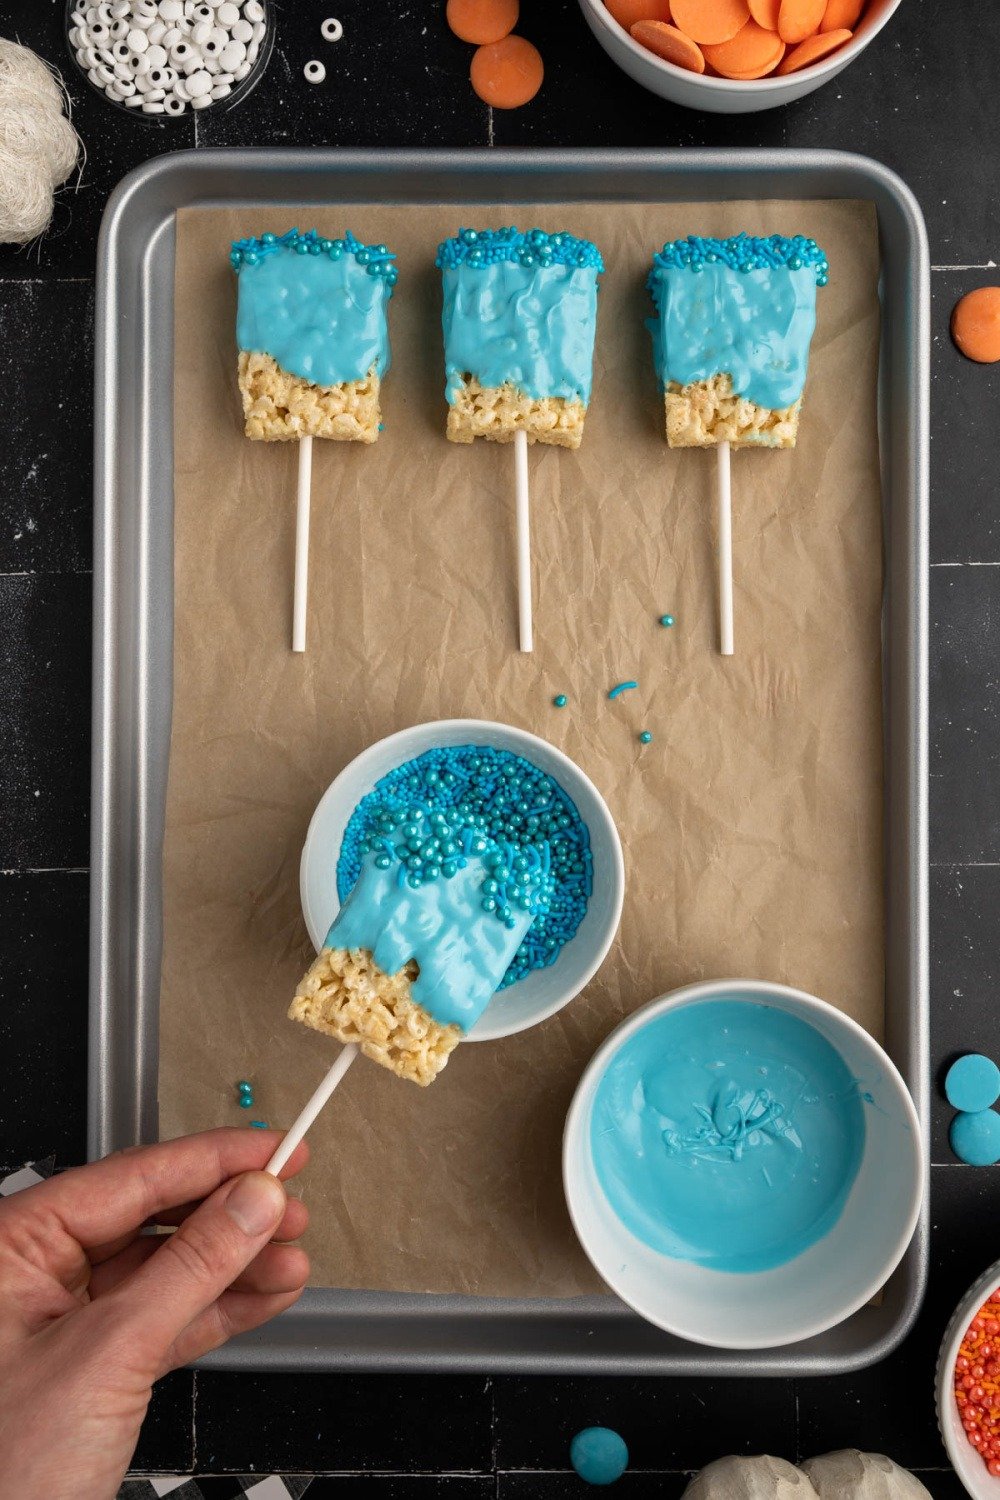
- Pour each color of sprinkles into separate bowls and set them next to the area you lined with parchment paper. Transfer each color of candy melting wafers into separate microwave-safe bowls. Work with one color at a time to prevent the chocolate/melting wafers from drying before you have time to coat all the treats. Place the bowl in the microwave and microwave on high for 30 seconds, remove and stir. Microwave for 15-second increments, removing each time to stir before heating for another 15 seconds. Repeat until all the wafers are completely melted.
- Once you have one color of wafers/chocolate fully melted, start dipping half of the treats in chocolate coating about 2/3 of the treat. Hold the treat upside down by the stick and let most of the excess chocolate drip off (about 5 seconds). When you get low on chocolate you can use a spoon to help cover the treats. After dipping in the chocolate, dip the tops of treats into the same color of sprinkles. Then lay the treat down on the parchment paper.
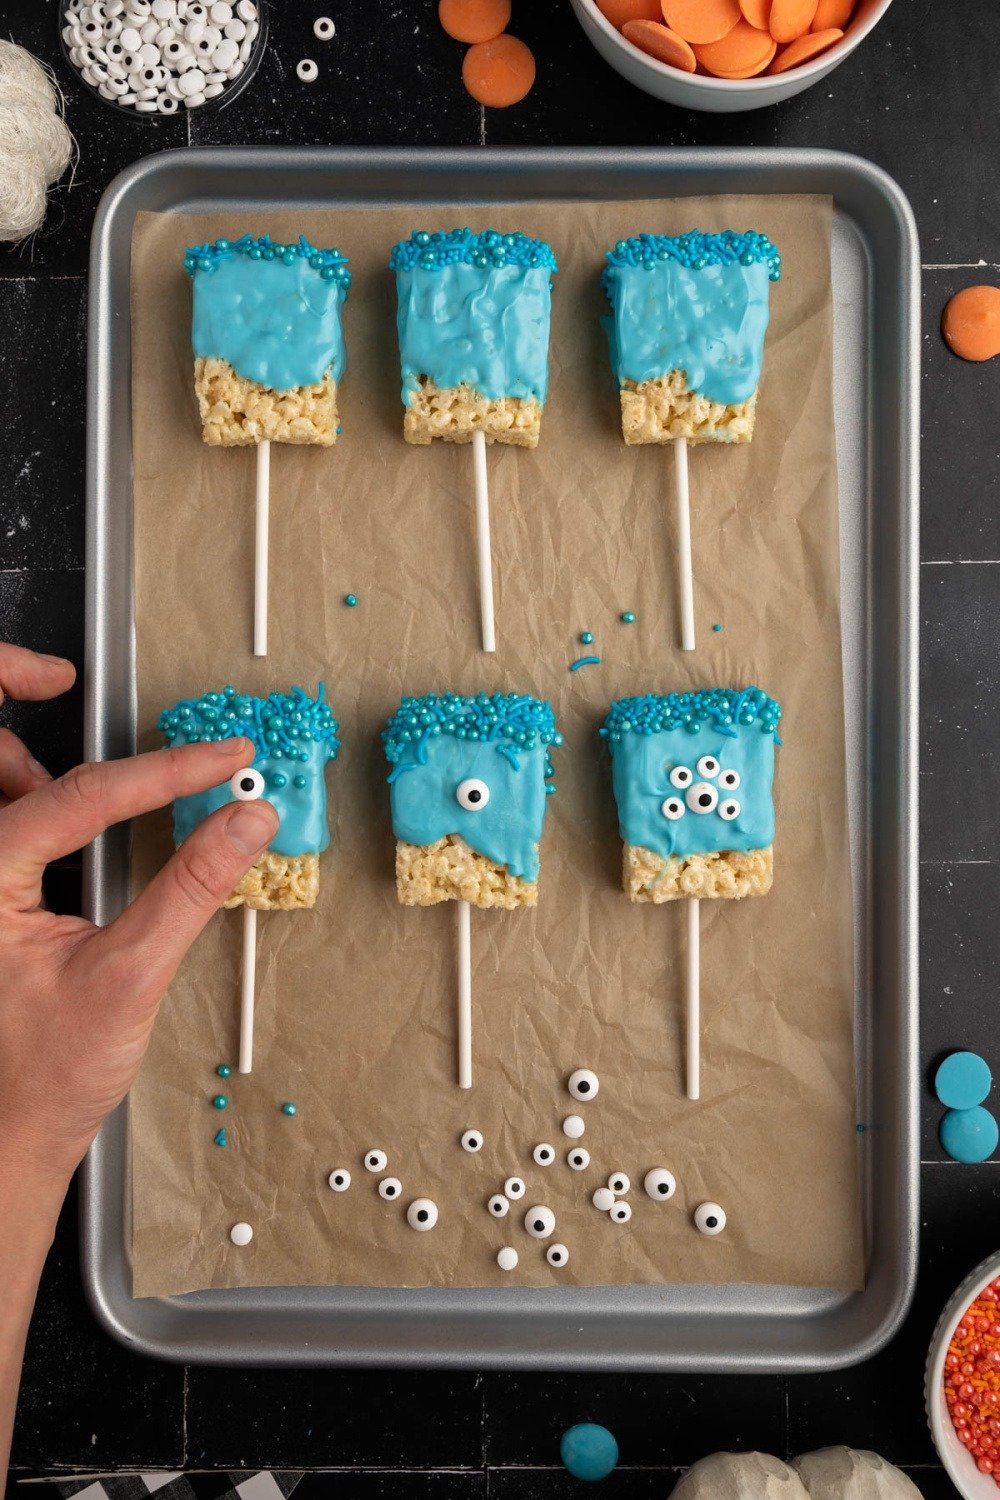
- Before the chocolate is dry, carefully place the eyes. You can make some monsters into cyclopes, and others can have multiple eyes.
- Let the chocolate dry for about 10-15 minutes. Once fully dry, store in an airtight container or resealable zipper bag on the counter. For best quality, consume within 3-4 days.

More Halloween Favorite Recipes
Monster Pops Rice Krispie Treats
Email this recipe!
Get this recipe emailed straight to your inbox!
Equipment
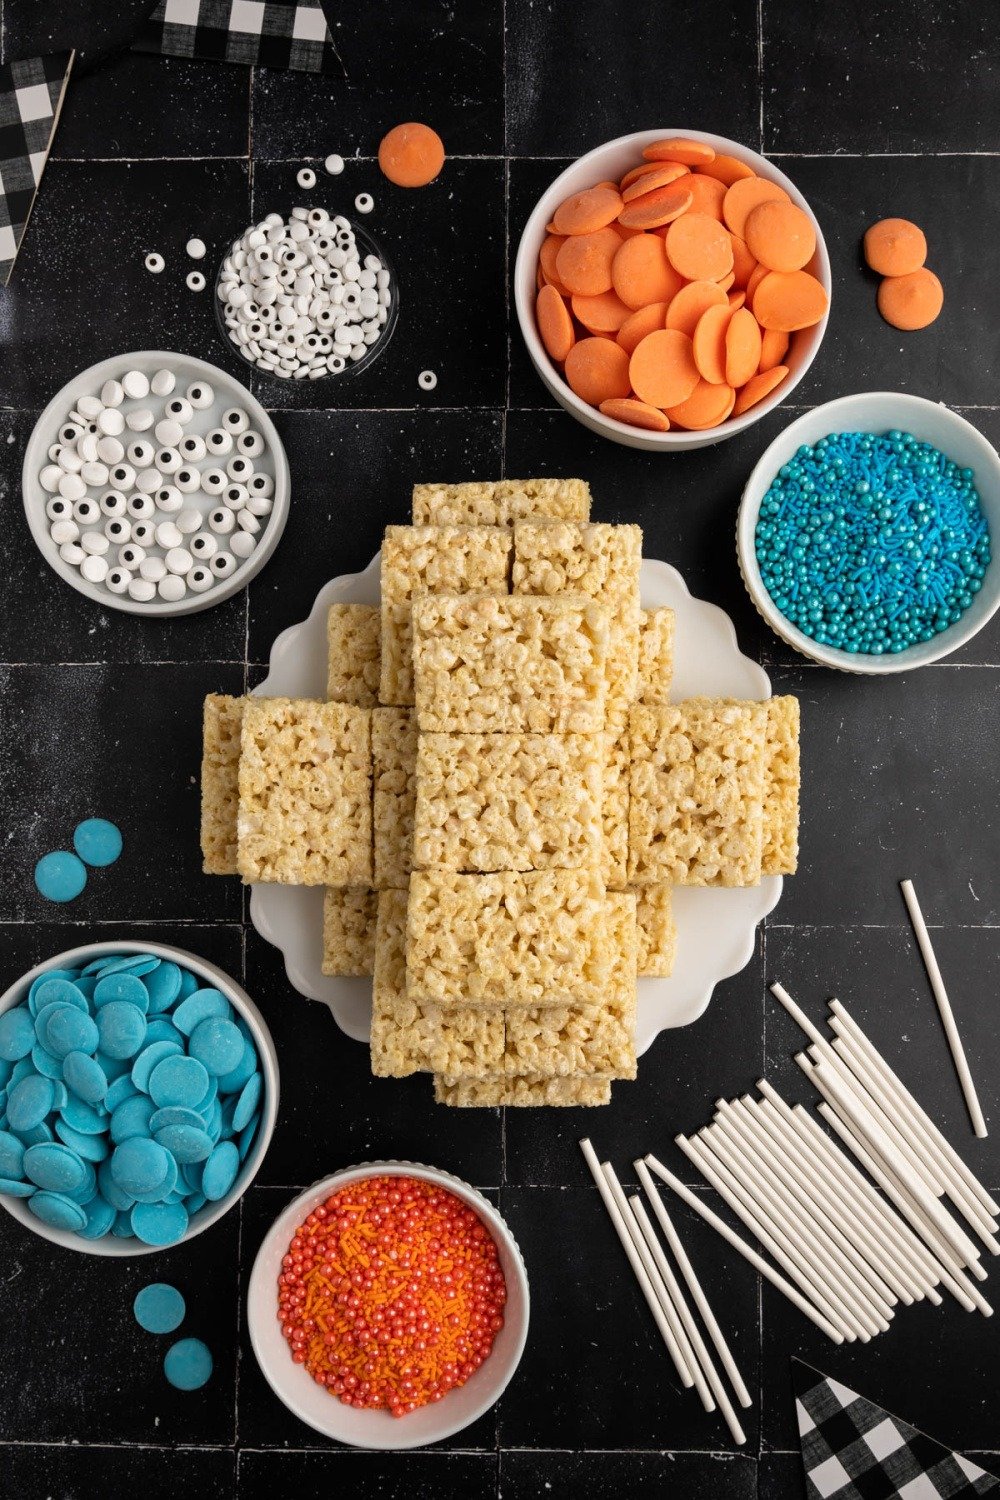
Ingredients
- 20 premade Rice Krispies Treats
- 12 oz. package of orange candy melting wafers or colored white dipping chocolate
- 12 oz. package of blue candy melting wafers or colored white dipping chocolate
- 1/3 cup orange sprinkles
- 1/3 cup blue sprinkles
- Candy eyes 2 different sizes
- Cake pop sticks
Instructions
- Line a baking sheet, counter top or table with parchment paper. You will need space to do all 20 treats at the same time or you will have to do them in batches, letting each batch dry before transferring it.
- Unwrap Rice Krispies Treats. Skewer each treat with a cake pop stick. Press the stick in at the short end of the Rice Krispies Treat and push it in until it is about halfway in the treat.
- Pour each color of sprinkles into separate bowls and set them next to the area you lined with parchment paper.
- Transfer each color of candy melting wafers into separate microwave-safe bowls. Work with one color at a time to prevent the chocolate/melting wafers from drying before you have time to coat all the treats. Place the bowl in the microwave and microwave on high for 30 seconds, remove and stir. Microwave for 15-second increments, removing each time to stir before heating for another 15 seconds. Repeat until all the wafers are completely melted.
- Once you have one color of wafers/chocolate fully melted, start dipping half of the treats in chocolate coating about 2/3 of the treat. Hold the treat upside down by the stick and let most of the excess chocolate drip off (about 5 seconds). When you get low on chocolate you can use a spoon to help cover the treats.
- After dipping in the chocolate, dip the tops of treats into the same color of sprinkles. Then lay the treat down on the parchment paper.
- Before the chocolate is dry, carefully place the eyes. You can make some monsters into cyclopes, and others can have multiple eyes.
- Let the chocolate dry for about 10-15 minutes. Once fully dry, store in an airtight container or resealable zipper bag on the counter. For best quality, consume within 3-4 days.
Notes
Nutrition
Nutritional Disclaimer: Family Fresh Meals is not a dietician or nutritionist, and any nutritional information shared is only an estimate. We recommend running the ingredients through an online nutritional calculator if you need to verify any information.
Did You Make This Recipe?
Make sure to share it with me below!