

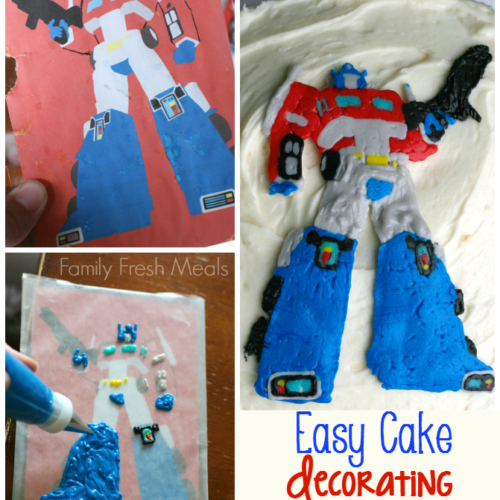
Easy Cake Decorating with Frosting Transfers
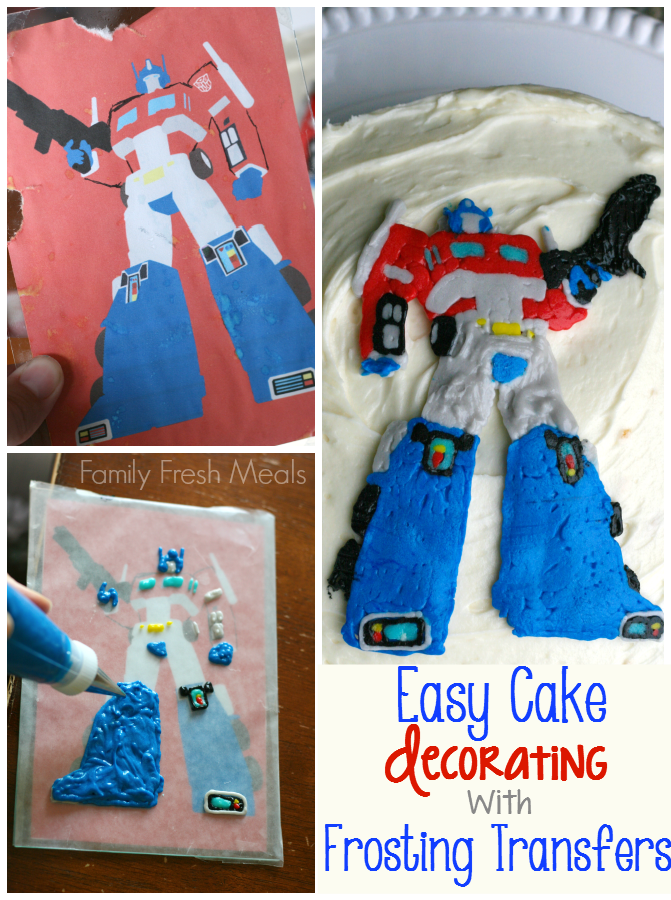
I learned this life-saving cake decorating tip from Moey’s Heart & Hearth. You won’t believe how easy it is to create amazing cake decorations. You can easily make a cake decoration with any coloring page you can find. SO COOL, right? All you need is a printed image, wax paper, some butter cream frosting and piping bags!
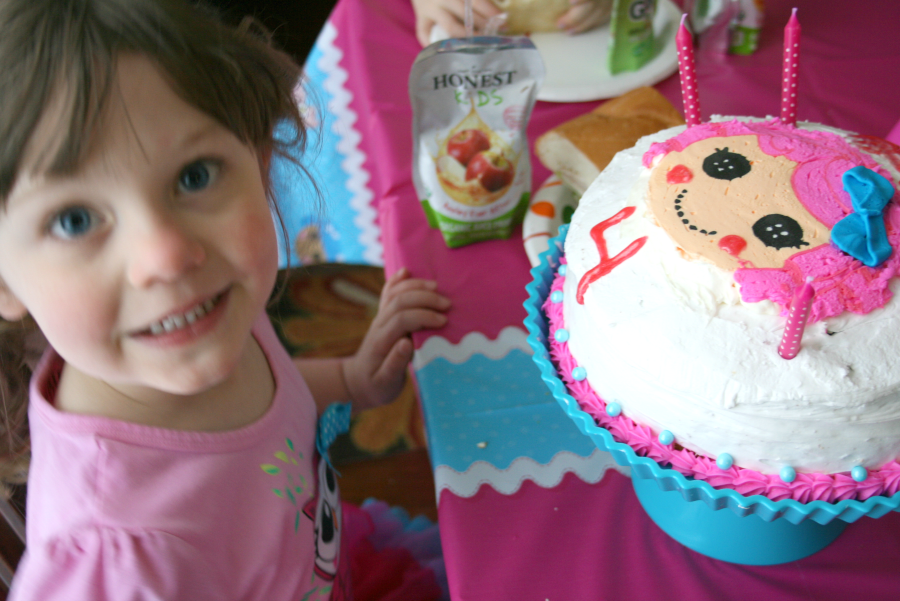
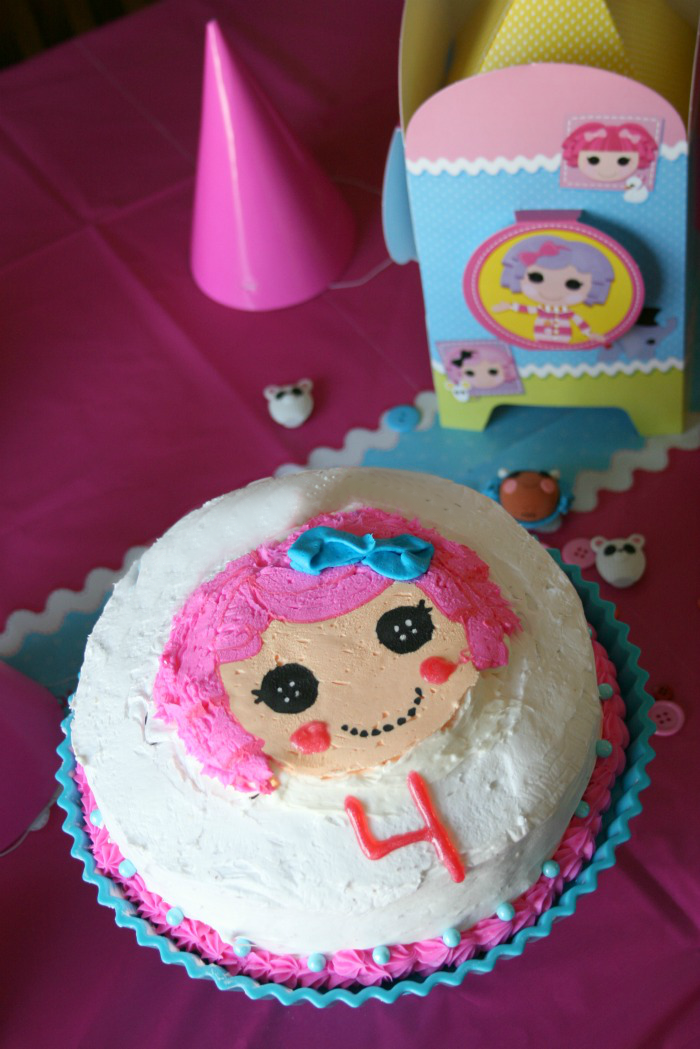
I made this Transformer cake for dear friend Phil who LOVES himself some Transformers 🙂 I also made this LaLa Loopsy cake using this frosting tutorial for Little D’s 4th birthday.
Email Me This Recipe!
Need to save time? Have this article emailed straight to your inbox + sign up for all the latest recipes!
This technique could be used in endless ways. For birthday cakes, baby showers, Valentines Day, Easter, Halloween, Christmas, etc.. Basically any event that has cake involved!
Here how you do an Easy Cake Decorating with Frosting Transfers
- A printed out image or coloring page that will fit the size of your cake.
NOTE: your image will be reversed when placed on the cake, so if you are using words, you will need a mirror image. of the print out. This isn’t an issue with images (see transformer collage above) - A small piece of glass, such as a small picture frame glass
- wax paper
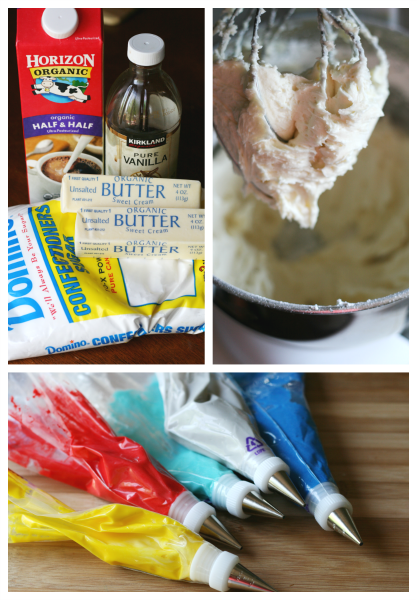
- buttercream frosting made with butter ( this is a MUST. When you freeze the transfer, what makes it harden and form is the butter)
- food coloring
- pipping bags & frosting tips (or ziplock bags with tips cut off)
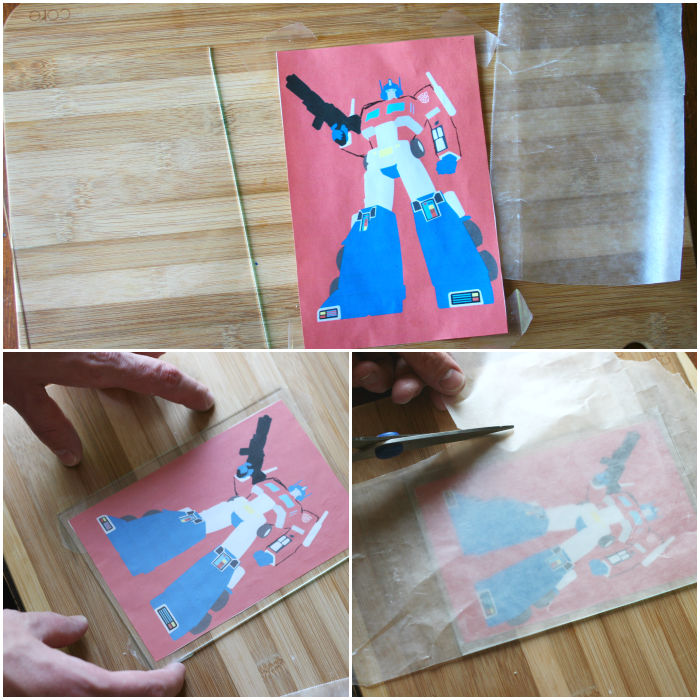
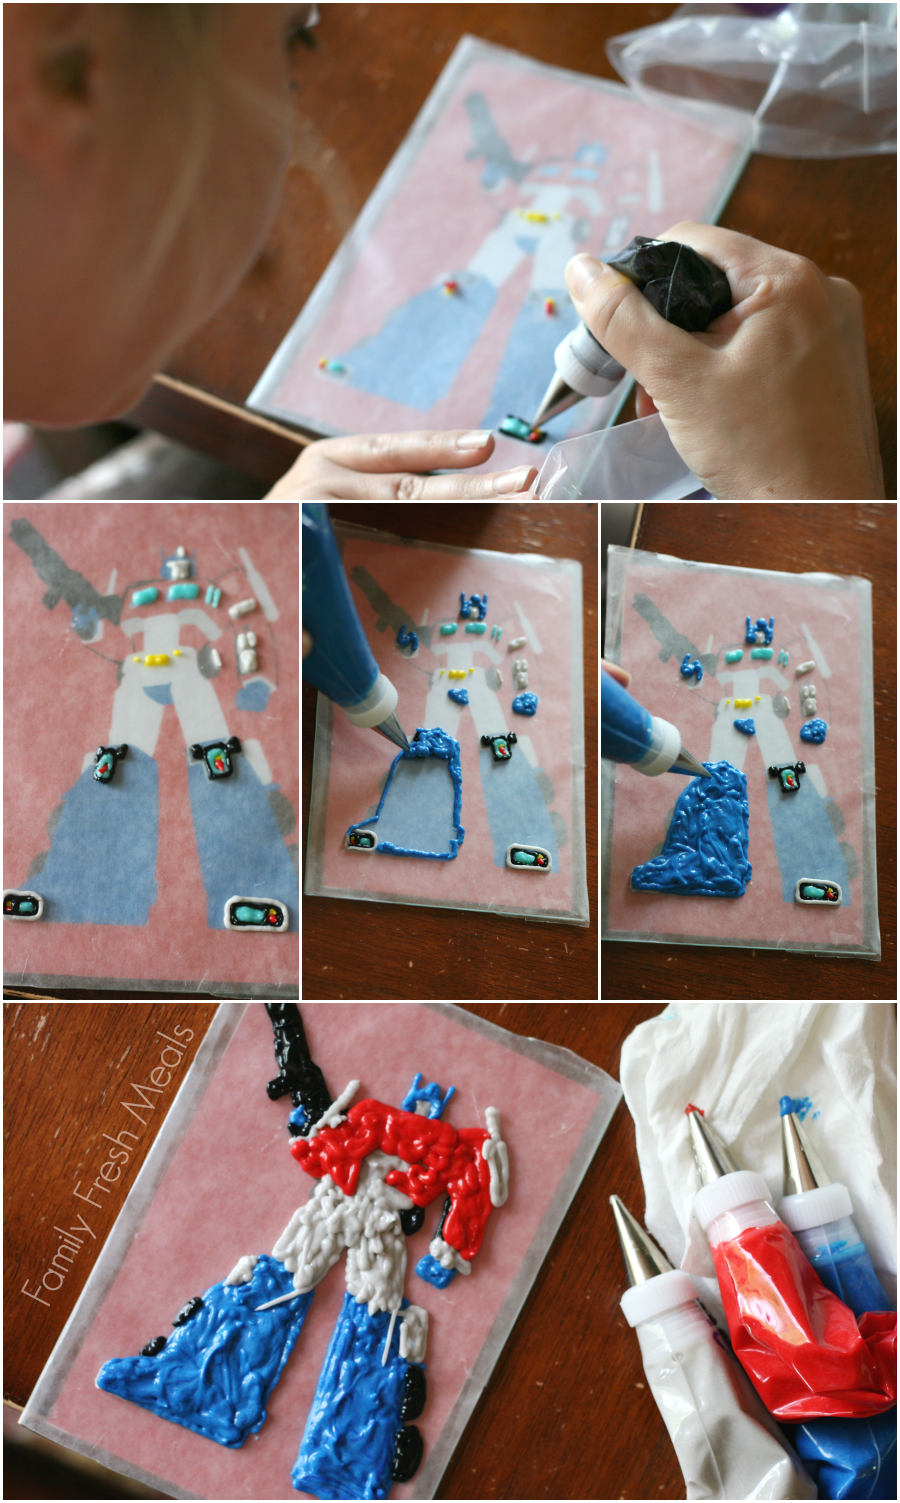
- Start by trimming your image, and tape it to the back side of a flat piece of glass. We used the glass from a small picture frame. Tape the same sized piece of wax paper to the front of the glass. You should now have an image/glass/wax paper “sandwich. “

- Next mix the colors you need for your image and fill your frosting bags. If you don’t have frosting bags, you can also use ziplock bags with the tiniest part of the corner cut off. Here is a recipe for Buttercream Frosting if need one 🙂

- Now the fun part! Trace over areas that you want to see on your finished product. This bottom layer is going to be the what you see on top of your transfer. So you you have to carefully think one step at a time, which layer you want to put on next. Make sure to color in all the areas with the icing layers to a depth of about 1/4 inch, making sure your whole design is supported by that 1/4″ thickness of icing.
- So as you can see in my steps below, I wanted the little button on the Transformer to pop out in the front, so I did those first. The solid blue of the Transformer’s main leg should appear behind the buttons, so I did that last. Remember, the part you are going to see on the cake it the bottom layer, so you don’t have to worry about the lumpy backside of the frosting.

- Place the whole transfer glass, into the freezer and freeze for about 30 minutes to a hour or until the icing is hard to the touch.
- Take your transfer out of the freezer and make sure the icing is nice and hard. Un-tape the wax paper from the glass and carefully place the side facing up ( the ugly side) onto the cake. Press it down a little so it sticks to the cake.
Now carefully, peel the wax paper away from the design, to reveal your frosting design.
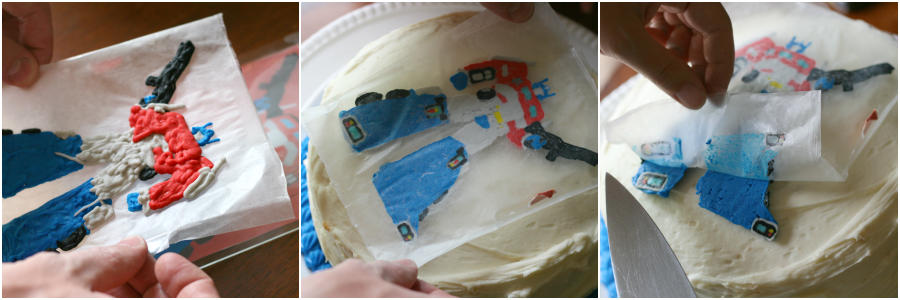
Ta – Da!
Easy Cake Decorations with Frosting Transfers
Email this recipe!
Get this recipe emailed straight to your inbox!
Ingredients
- - A printed out image or coloring page that will fit the size of your cake.
- NOTE: your image will be reversed when placed on the cake so if you are using words, you will need a mirror image. of the print out. This isn't an issue with images (see transformer collage above)
- - A small piece of glass such as a small picture frame glass
- - wax paper
- - buttercream frosting made with butter this is a MUST. When you freeze the transfer, what makes it harden and form is the butter
- - food coloring
- - pipping bags & frosting tips or ziplock bags with tips cut off
Instructions
- Start by trimming your image, and tape it to the back side of a flat piece of glass. We used the glass from a small picture frame. Tape the same sized piece of wax paper to the front of the glass. You should now have an image/glass/wax paper "sandwich."
- Next mix the colors you need for your image and fill your frosting bags. If you don't have frosting bags, you can also use ziplock bags with the tiniest part of the corner cut off. Here is a recipe for Buttercream Frosting if need one 🙂
- Now the fun part! Trace over areas that you want to see on your finished product. This bottom layer is going to be the what you see on top of your transfer. So you you have to carefully think one step at a time, which layer you want to put on next. Make sure to color in all the areas with the icing layers to a depth of about 1/4 inch, making sure your whole design is supported by that 1/4" thickness of icing.
- So as you can see in my steps below, I wanted the little button on the Transformer to pop out in the front, so I did those first. The solid blue of the Transformer's main leg should appear behind the buttons, so I did that last. Remember, the part you are going to see on the cake it the bottom layer, so you don't have to worry about the lumpy backside of the frosting.
Nutritional Disclaimer: Family Fresh Meals is not a dietician or nutritionist, and any nutritional information shared is only an estimate. We recommend running the ingredients through an online nutritional calculator if you need to verify any information.
Did You Make This Recipe?
Make sure to share it with me below!
Post updated September 2020


Great tutorial!! How fun and easy 😀
Wow!!! I never thought of doing this before. Love the idea. Thank you so much.
I’ve done this, and love the idea, but am always frustrated that the design is never ‘smooth’.. like shows the piping lines. I’d love to figure out how to fix that, but this tutorial is one of the best I’ve seen! Great cakes!
If there is a way to thin the icing slightly – you might be able to get a flow effect like when decorating cookies using Royal icing. I will do some checking because that is what I would be worried about as well.
I found another tutorial where after the transfer starts to thaw, they took a paper towel and gently rubbed, which got rid of the piping lines.
She also made an entire circle (she was doing an 8″ round cake, so she did 7″) and filled the whole thing in with white (her chosen background color) around the design, so when it was placed on the cake, everything sat flush.
She then did a border around the outside to hide the edges, It was pretty cool.