How to Grow Micro Sprouts
Did you know that you can grow your own Micro Sprouts in your very own home? Microgreens are easy to grow and mature rapidly, often within 7-10 days, making them an accessible option for home gardeners and restaurants looking for fresh, on-demand greens. You don’t need a large garden to grow micro greens. They can thrive in small spaces, such as windowsills, countertops, or balconies. Due to their high nutrient content and potential health benefits, micro greens are considered a superfood.

These tiny greens are packed with flavor and nutrition, and they offer several benefits: such as vitamins C, K, and E, minerals like iron and potassium, and antioxidants.
Tips when growing your own sprouts
How to Grow Micro Greens
- You can grow micro greens in trays, shallow containers, or even recycled food
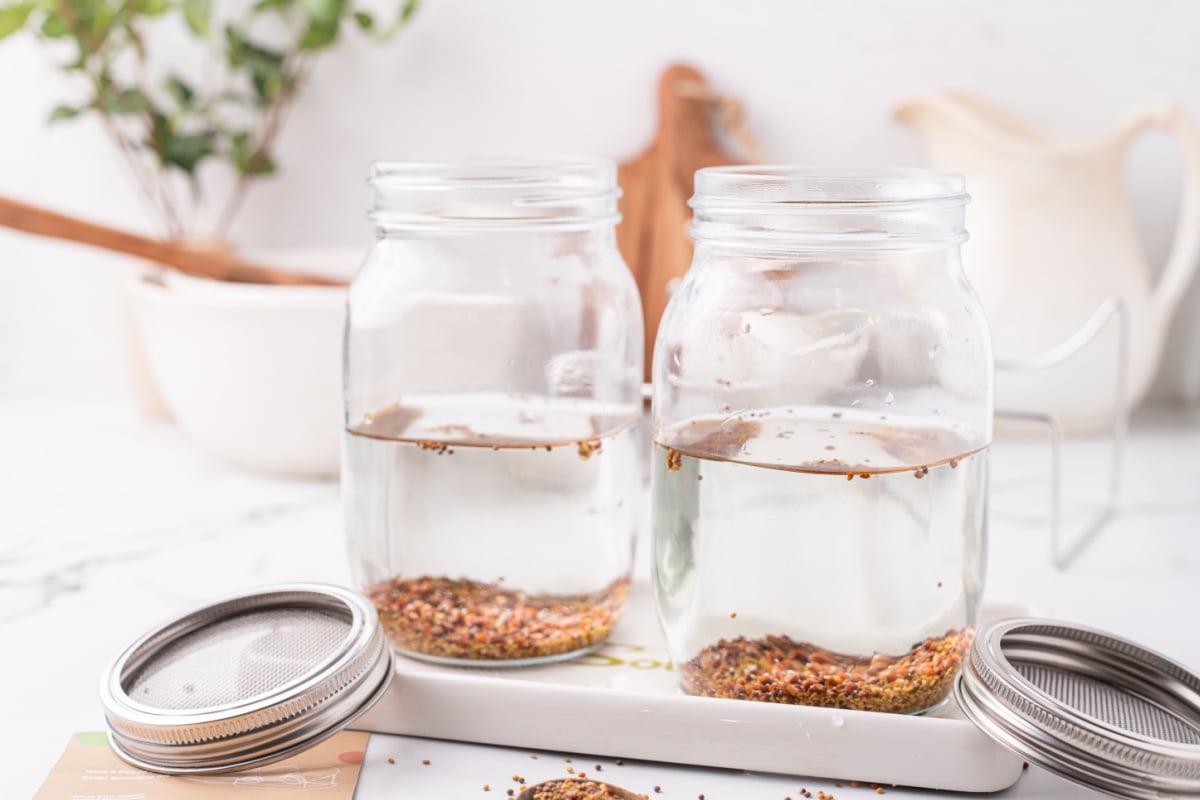
containers with drainage holes. I love these Sprout Kits because they provided 2 large mason jars with a mesh netting lid so the water from rinsing daily could slowly drain out. This ensured that the container prevented growing mold or disease when sprouting. These sprout seeds are my favorite as well!
- Some seeds benefit from pre-soaking for a few hours to overnight to improve germination rates. Check seed packets for specific recommendations. We soaked overnight. The next morning, I rinsed out and drained the excess water.
- Gently roll the jar so the seed will stick to the sides. By day 3 you see your seeds
really starting to sprout. - Remember to rinse every morning and night.
- Keep the growing environment between 60-75°F.
- Once the seeds have germinated and started to grow, move them to a well-lit location. A sunny windowsill or fluorescent grow lights.
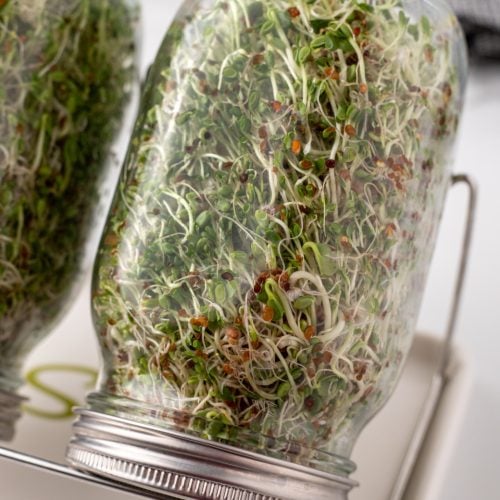
- Once your container is full, remove, rinse, dry and store microgreens in the refrigerator to maintain freshness.


Ways to Use Your Sprouts
- Salads: Microgreens are a popular addition to salads, providing a burst of flavor.
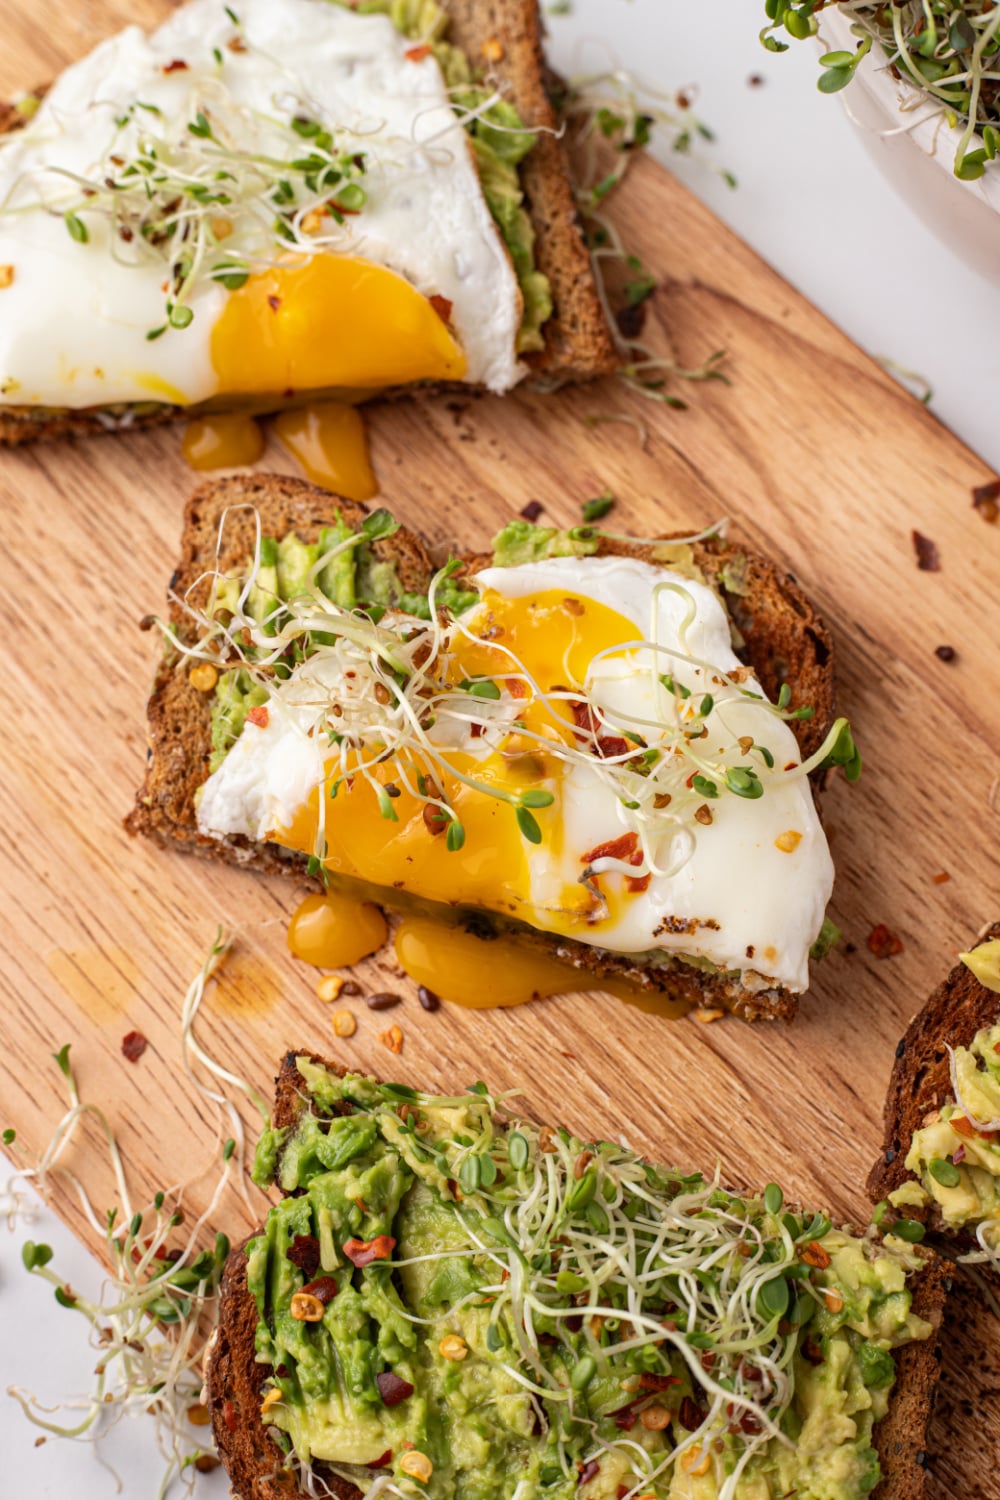
They pair well with both green salads and grain-based salads. - Sandwiches: Add microgreens to sandwiches for an extra layer of freshness and texture. They work well in sandwiches with various fillings, from meats and cheeses to even spreads.
- Wraps: Microgreens can be used as a filling or garnish in wraps and burritos. They complement ingredients like grilled chicken, tofu, or beans.
- Burgers: Top your burgers, whether they’re made from beef, chicken, turkey, or plant-based ingredients, with a handful of microgreens for a refreshing crunch.
- Pizza: After baking a pizza, sprinkle microgreens on top for a pop of color and a unique flavor twist. They’re particularly delicious on a creamy sauce pizza.
- Omelets and Scrambled Eggs: Incorporate microgreens into your morning eggs for added freshness and a nutrient boost. They work well in omelets, scrambles, and frittatas.
- Soups and Stews: Just before serving, float a few microgreens on top of hot soups
- and stews to brighten up the presentation and add a hint of freshness.
- Rice and Grain Bowls: Whether you’re making a grain bowl, rice bowl, or grain based salad, microgreens can be used as a topping to add color and flavor.
- Smoothie Bowls: Sprinkle microgreens on top of your smoothie bowls for a surprising twist. They can add a contrast in texture and taste to the creamy base.
- Fish and Seafood: Microgreens pair well with fish and seafood dishes, such as grilled fish fillets or seared scallops. They can add a burst of color and flavor.
- Tacos and Tostadas: Enhance your taco and tostada fillings with microgreens. They work particularly well in fish tacos and vegetarian options.

How to Grow Micro Sprouts
Email this recipe!
Email Me This Recipe!
Need to save time? Have this article emailed straight to your inbox + sign up for all the latest recipes!
Get this recipe emailed straight to your inbox!
Equipment
Ingredients
- Sprout Seeds
Instructions
- I love this sprout kits all because they provided 2 large mason jars with a mesh netting lid so the water from rinsing daily could slowly drain out. This ensured that the container prevented growing mold or disease when sprouting.
- Some seeds benefit from pre-soaking for a few hours to overnight to improve germination rates. Check seed packets for specific recommendations. We soaked overnight. The next morning, I rinsed out and drained the excess water.
- Gently roll the jar so the seed will stick to the sides. By day 3 you see your seeds really starting to sprout.
- Remember to rinse every morning and night.
- Keep the growing environment between 60-75°F.
- Once the seeds have germinated and started to grow, move them to a well-lit location. A sunny windowsill or fluorescent grow lights.
- Store any unused microgreens in the refrigerator to maintain freshness.
- By day 7 my mason jar was packed with beautiful micro greens.
Nutritional Disclaimer: Family Fresh Meals is not a dietician or nutritionist, and any nutritional information shared is only an estimate. We recommend running the ingredients through an online nutritional calculator if you need to verify any information.
Did You Make This Recipe?
Make sure to share it with me below!